What to do with a lot of old Printed Circuit Boards?
The Circuit Board Table – The Final Result

It all started with an old factory that was about to be cleared of inventory before demolition. I was allowed to get a lot of old SAIA PCA1 PLC systems for free I just had to remove them myself. Unfortunately I don’t have any pictures from the PLC room. But imaging a room the size of a small office packed with PLC racks along all the walls of the room. Unfortunately the room had been vandalized so the cabinet doors had been broken open and some of the equipment had been smashed.
However I managed to salvage around 20 complete PLC systems from the room together with several hundreds of SPDT relays mounted in the racks and connected to the outputs of the PLCs. The relays are still lying around somewhere in a box waiting for me to build something cool out of them like playing with Digital Relay logic, build a Digital Relay Clock, or something like a Single Board Relay Computer. However my main reason for keeping them is to build a relay version of the discrete logic in the SN74LS181 4-bit ALU.
In each PLC unit there was a motherboard consisting of an Intel 8085 8-bit microprocessor together with 62256 RAM, 8255 PPI, 8251 UART and 8253 Timer chips and the corresponding control logic. On two modules on top of the motherboard up to eight I/O boards were connected. As I understand it, these boards were ADC input board, multiplexer boards for BCD switches, output TRIAC boards, mixed input output boards, communication modules to passive extension housing modules without the CPU but with room for eight extra I/O boards.
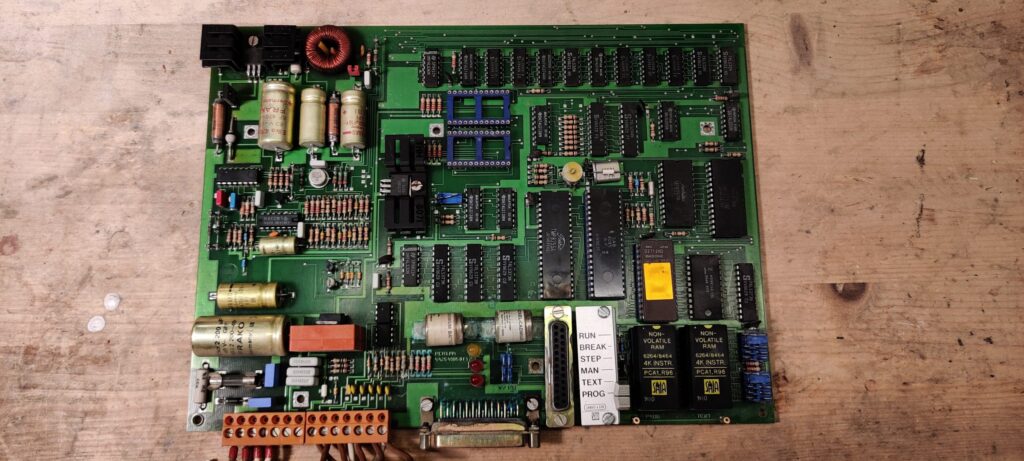
SAIA PCA1 PLC mainboard, the two blue DIP sockets are for the I/O boards

For a long time I didn’t know what to use all that equipment for, clearly it didn’t work. Most of the motherboards had clear signs of leaking backup batteries and some was missing the program EEPROMs. I kept them because I wanted to build a nice visual decoration out of it.
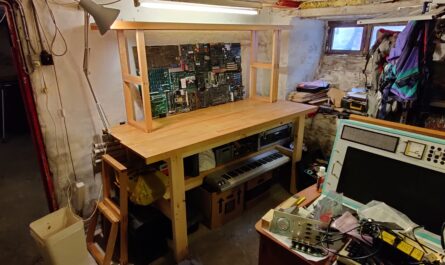
One night I was searching around on Google image search about circuit board decoration and came across Chris Harrison’s Circuit Table. Immediately I knew what to do with my pile of old circuit boards and computer motherboards, I wanted to build something like Chris’s table. Instead of the IKEA Lack table that he used as a basis I wanted to go with a bit more industrial look. I started to make a drawing in Sketchup with one of my favorite building materials 20×20 extruded aluminum profiles.

Sketchup render of the circuit board table with 20×20 extruded aluminum chassis
The final design ended up much like I had imagined with a nice industrial look. The PCBs should be mounted under the top glass plate on a wooden plate. The lower horizontal part of the chassis stabilizes the legs and makes it possible to install a second wooden plate as a shelve by adding some extra support beams.
Parts needed for the table:
- glass plate 10mm, 135×75 cm
- wooden plywood plate(s) 12mm, 120×60 cm
- 8x 200cm 20×20 extruded aluminum profiles
- Screws and assembly corners for the beams
After a quick search for the parts needed for the table and prices, I realized that it would cost way more than what I was willing to spend on it. Especially because there isn’t room for the coffee table in my workshop at the moment. Instead of buying the glass plate new from a glazier I thought about reusing it from a second hand coffee table found online. Luckily I found a table with a glass plate of the correct dimensions on DBA in a nearby city. When I got the table home I realized that it would actually be possible to reuse the entire table with glass plate and metal chassis with minor changes.
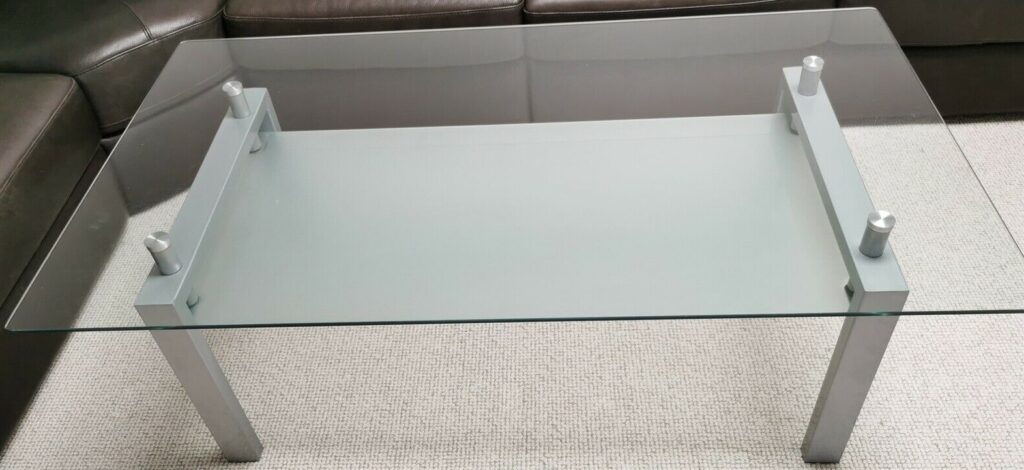
The table before any modifications

On top of the grey metal legs the plywood plate is installed and then the round tubes holding the table is just mounted on top of the wooden plate. Everything is kept in place my a threaded rod inside the round tubes. The plywood plate was prepared by cutting it to the right size, drilling holes in each corner for the threaded rod, sand it down and painting.

I used the bottom plate as a template to mark the drilling holes
After this the fun part begun; playing PCB Tetris, by installing them on the wooden plate and make them fit with the least overhang and avoid empty holes in between. The available Tetris pieces was the PCBs from the PLC (the reason why I got the idea to this project), some old PC motherboards with RAM and CPU and graphic cards I had harvested from computers found lying around for bulky waste and old development boards. After playing around with different layouts I found a solution were everything fit optimal.
Instead of just being a static decoration without anything happening, I wanted the table to have some dynamic features that could be implemented sometime in the future like a spinning fan, clicking relays or blinking LEDs. That is the reason for installing the LED diagnostics panel from an old IBM server acting as a Blinkenlights. There were also room for a small LED dot matrix scrolling display. Everything should be controlled from a small ESP8266 controlled through WiFi.
At the moment only the LED matrix display is controlled through the ESP8266. The device connects to my local network through WiFi, and then the display starts to show it’s IP address. When going to this page a small web server is loaded where a message can be entered to display on the display.
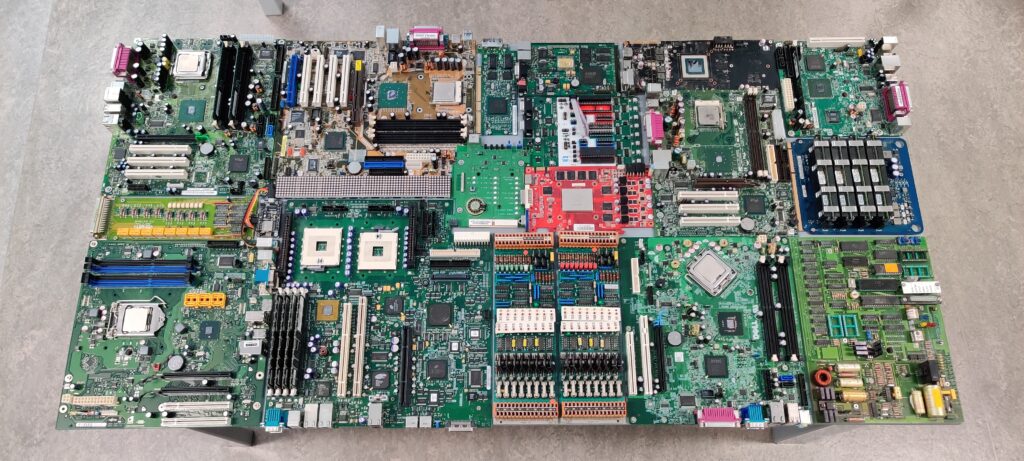
The final layout 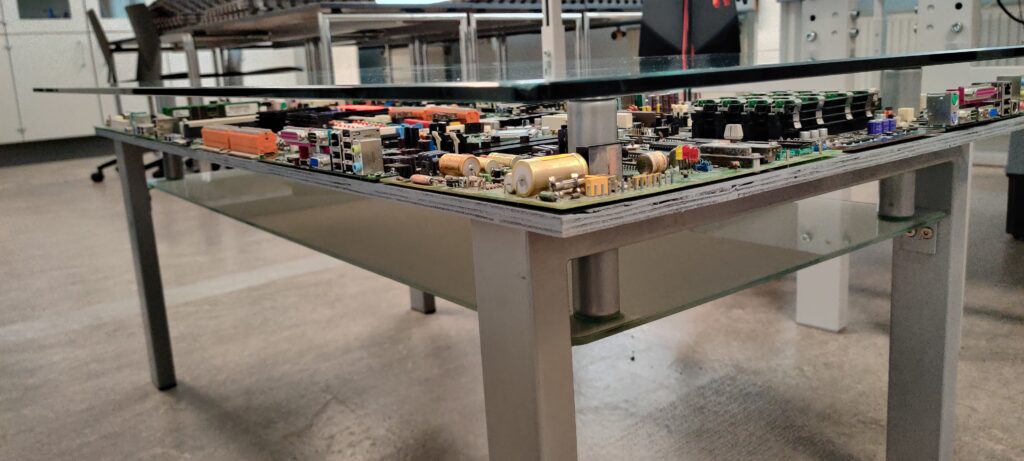
Angle view 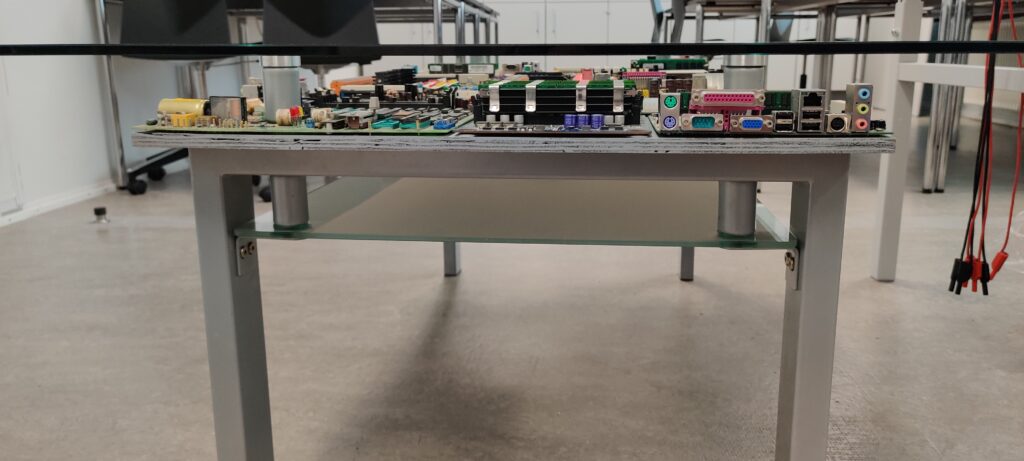
A side view showing how the wooden plate is mounted above the legs and below the cylinders holding the glass plate 
The table was almost designed to be modified like this 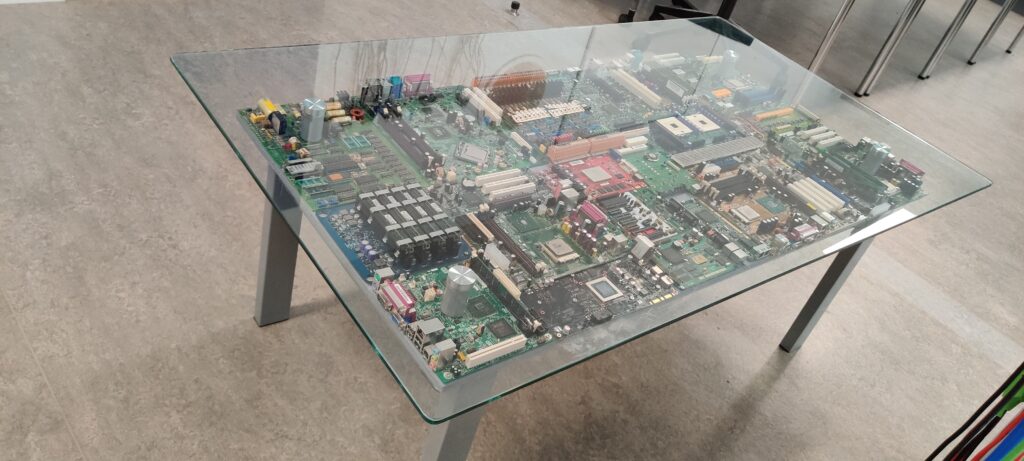
The finished table


A video showing the scrolling message, the table is shown without the glass plate mounted.
I’m very happy about the final design of the table, especially because I found a perfect donor table that saved me a lot of money since I didn’t had to buy the extruded aluminum profiles and the glass plate. This also greatly reduced the time I took for me to build the table.
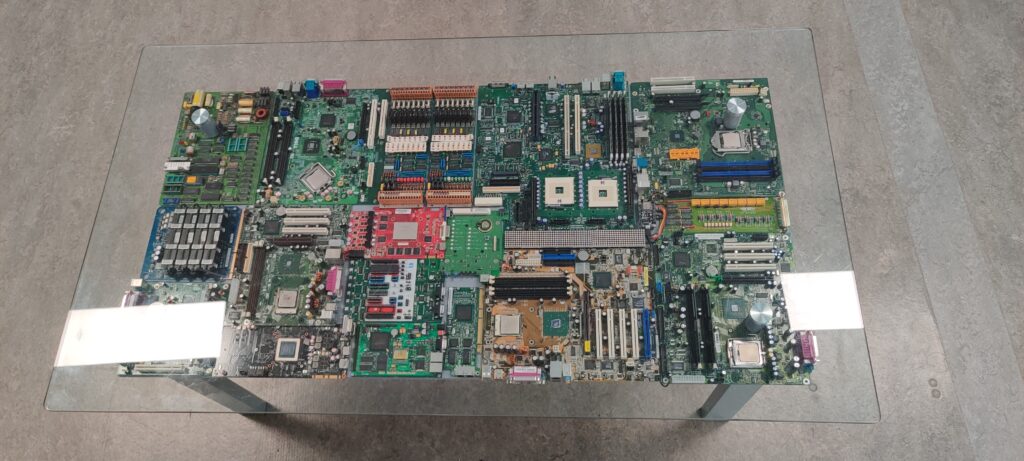
After assembling this table I still had plenty old printed circuit boards left so I assembled another wooden plate with some of them. The purpose of this could be to make another table. If anyone is interested in buying one contact me? For now I will use the plate as a background frame when taking pictures of the different items for my retro computer collection
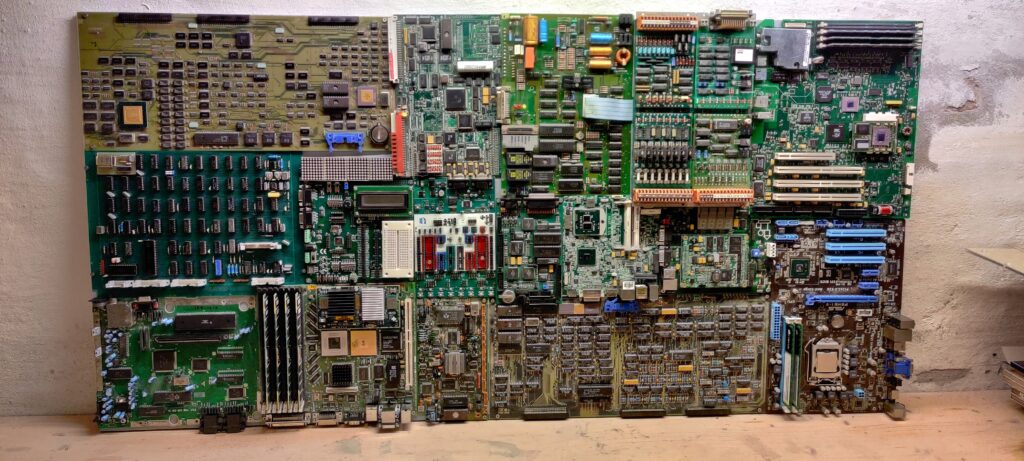
The second version of the PCB plate 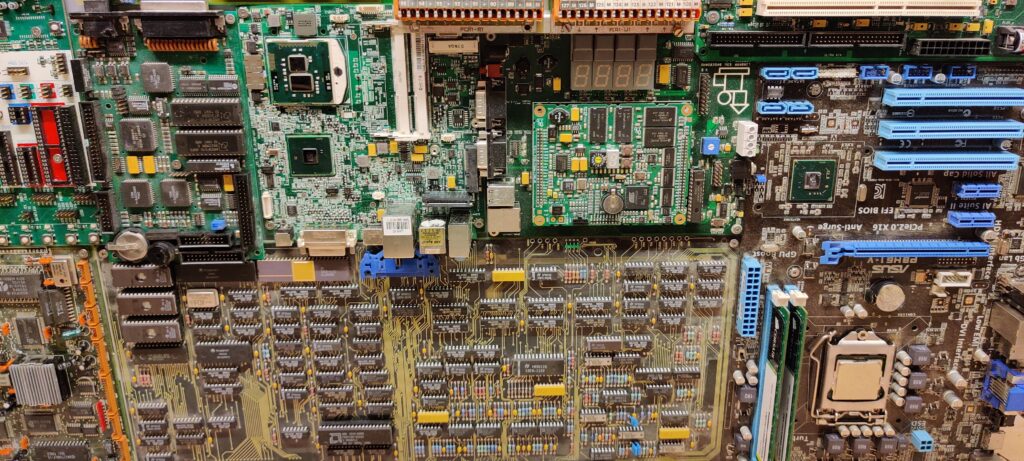
Close up of motherboards.. 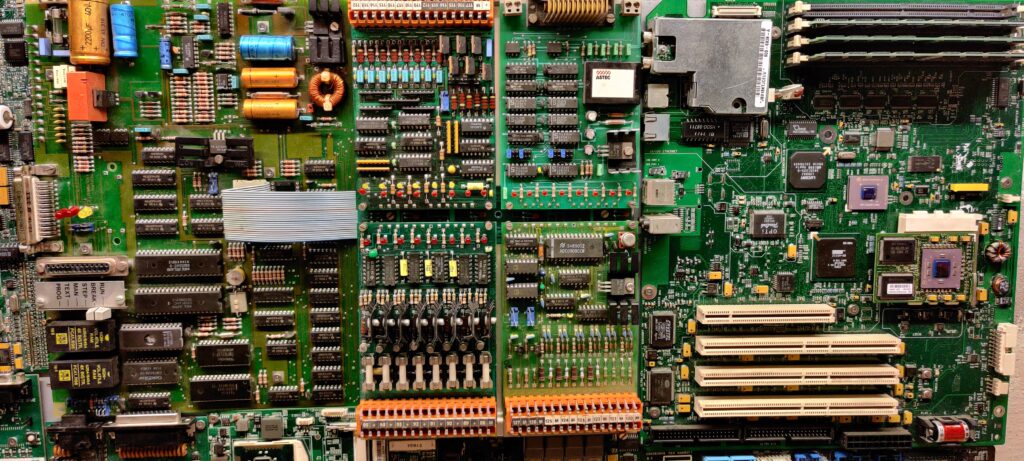
PLC board with I/O boards 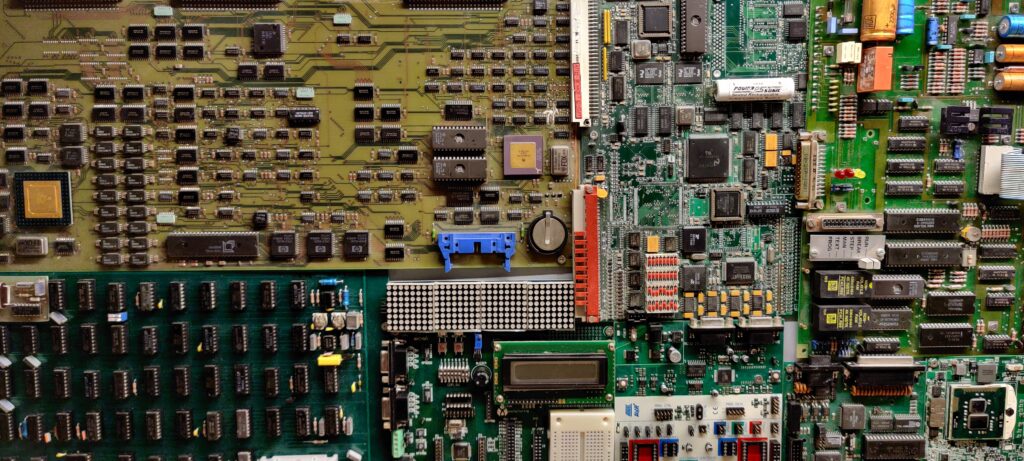
Old board from some HP equipment with a Motorola 68K CPU 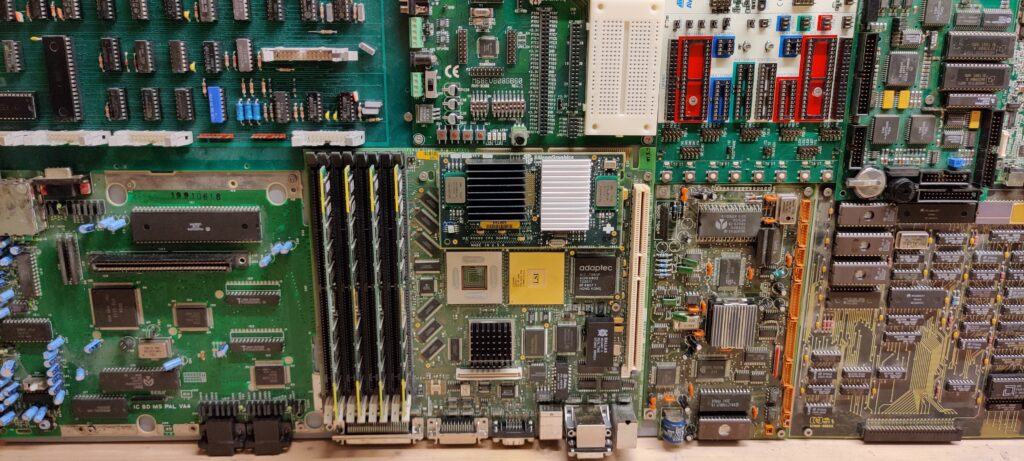
Board from a SEGA also with a 68K this time in the DIP64 package 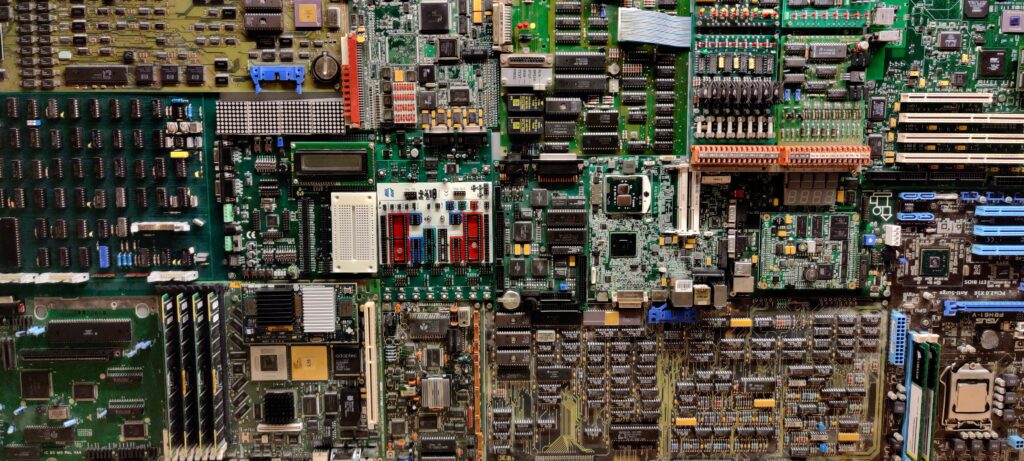
The middle of the board with STK500 and dot matrix disply