I have had the idea about building my own workbench for a long time. My inspiration was something like this workbench which I think would match most of my needs. My prejudice, however, was that it would be expensive to buy the wood and take a lot of time to build it – especially because I don’t own a slide compound miter saw like this one that’s on my wish list.
The workbench I had until now was a cheap wooden table top with four metal legs, you can see it here. It was doing the job, but without any fancy features or storage facilities.
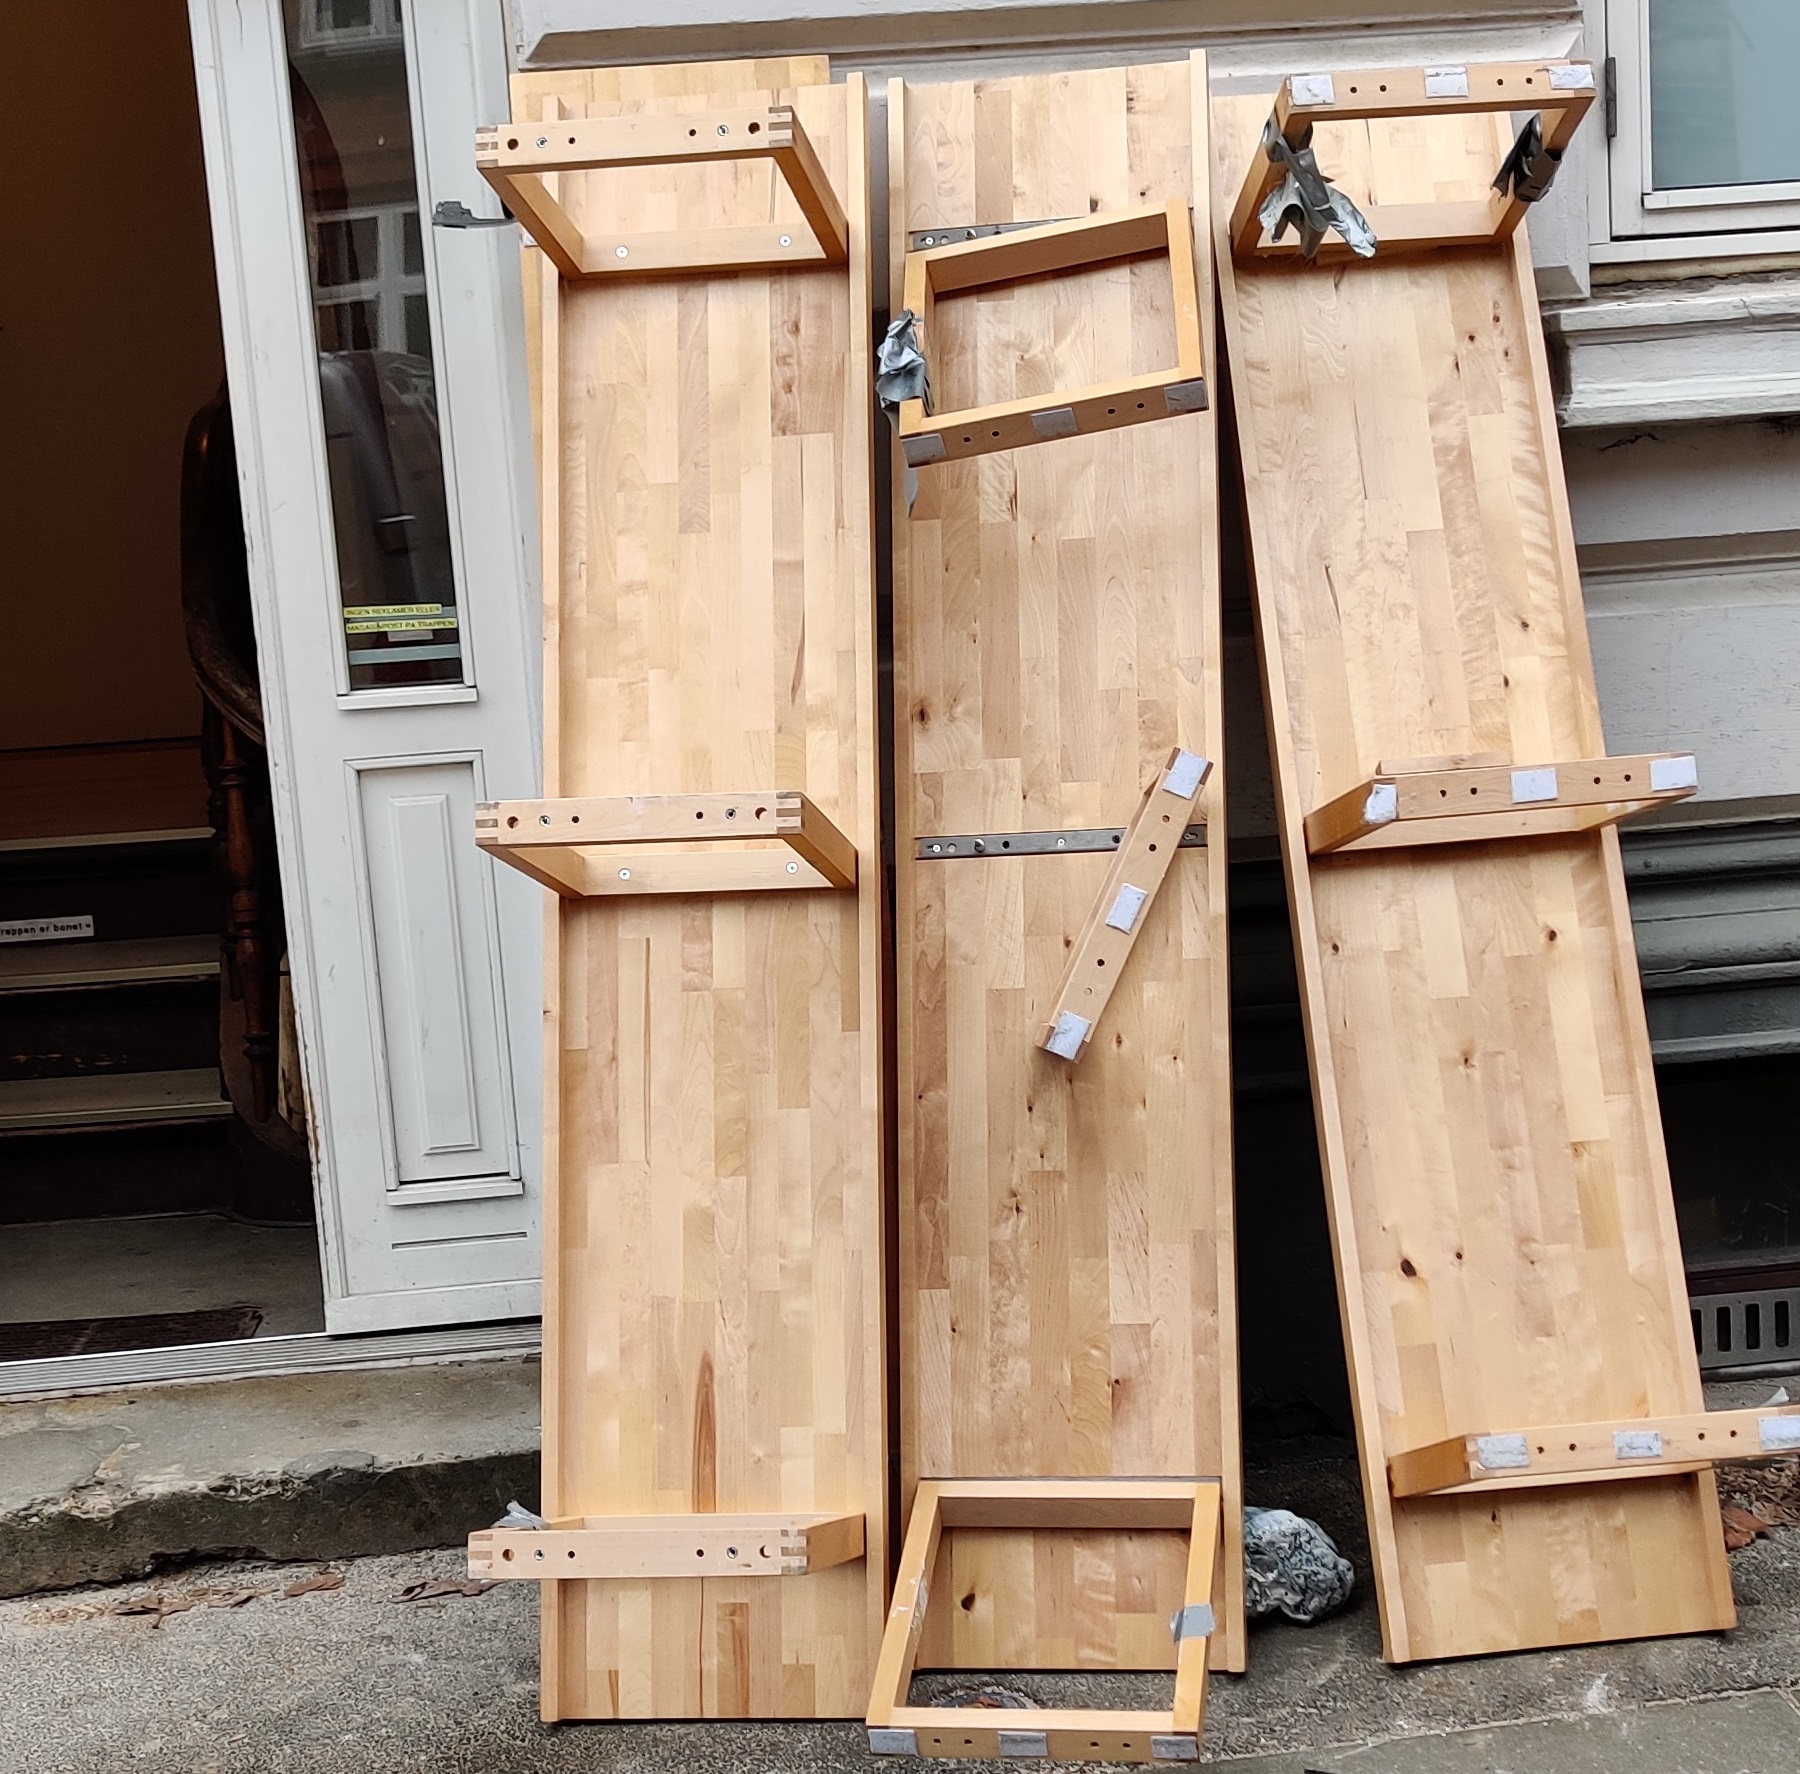
The reason for building the table now was just outside of my window the other day. On the other side of the street, where I live, someone had thrown out some wooden plates from what looked like a shelving system. I first saw them in the morning but thought it was an old Ikea furniture like a Kallax system. But when I saw it again later the same day I had to have a closer look at it. To my surprise the wooden plates or shelves were constructed out of glued wood so it was massive instead of garbage wood. I had to take the four shelves and the nine spacer parts with me and use it for a cool project.
WORKBENCH
My first idea was to use them for a later project in a house to build shelves in a storage room. But I didn’t want them to fill up my precious space for a longer time and thought they were a bit massive for shelves. When I saw two of the shelves lying on the floor next to each other I recognized that they would make up a perfect work surface for a workbench. Another shelf could be mounted beneath the tabletop between the legs of the table for storage of a toolbox or power tools. The last shelf would be mounted on some of the spacer parts that came with it, as a top shelf for storage of measuring equipment. The underside of the top shelf would be an obvious location for some LED lighting.
For a long time I wanted to buy something like a Blika workshop table or an electronics table from HIN.
Unfortunately both of them cost way more than I can afford and none of them completely fulfill my needs for a workbench. So I’m very happy with this design since I think it solve most of my needs.
DESIGN
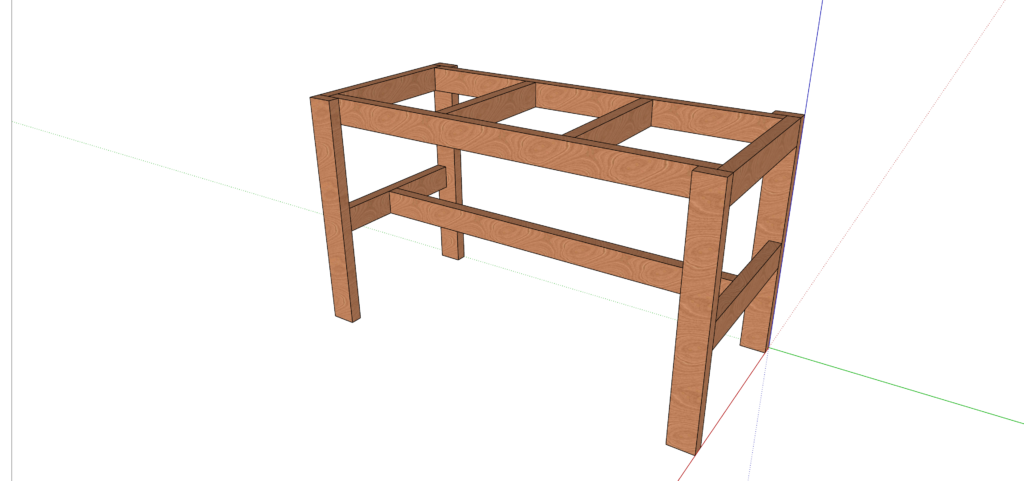
As usual before most of my projects I start by drawing everything in a 3D model. I started by drawing the shelf plates and the spacer rectangles. That made it much easier to play around with different designs and find the right dimensions for the wood I needed to buy.
The chassis of the workbench had to be built from new materials. So I took inspiration from this DIY workbench.
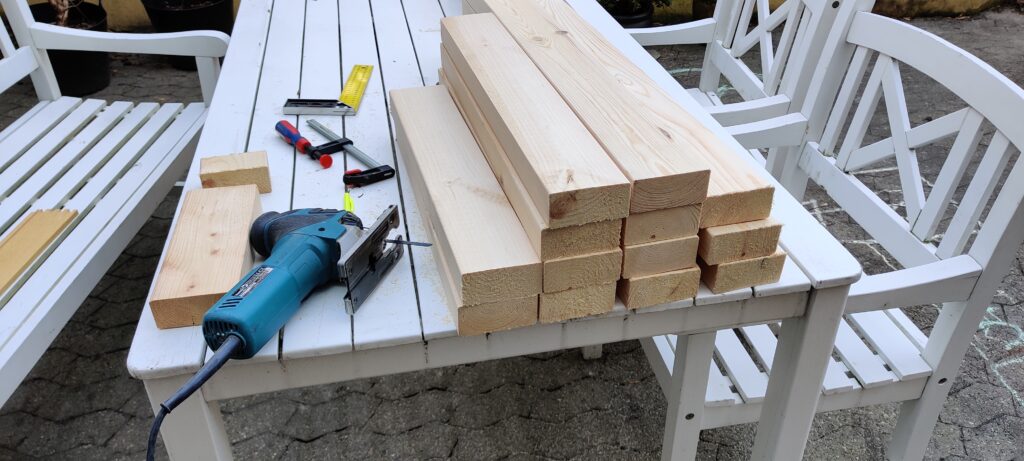
It is built from 2×4 lumber which translates into 47×100 mm or 45×95 when planned. In my first drawing I used the 47×100 mm by mistake, so I had to update it when I had bought the lumber and measured it to be around 45×95 mm. From my model I could also estimate the size and amount of screws that I needed.
ASSEMBLY
Parts list
- 5x 47×100 mm lumber 2.4 m length
- Box of wood screws 80 mm long
- 24x M6 40mm countersunk for upper part and top shelf
- 4x plates measuring 38×185 cm
- 8 pieces of rectangle spacer parts measuring 33.5×37 cm with threaded inserts in the top
Because I got the last two items on the list for free I ended up paying just around 200 DKR for the wood and the screws.
The five pieces of wood was cut into the following sizes
Pieces 1-3 is cut to 142 cm and 88 cm
Piece 4 is cut to 2×54 cm and 2×62.8 cm
Piece 5 is cut to 2×62.8 cm and 88 cm
- First the two end pieces are assembled by using 2×88 cm for legs and 2×62.8 cm for sides. Two screws are used to fix every joint together.
- The two end modules are connected by the 2×142 cm cross sections. In the upper corner joints four screws are used.
- To reinforce the support of the table top two pieces of 54 cm are mounted between the long pieces.
- To reinforce the bottom shelf and stabilize the table, another piece of 142 cm is mounted between the end modules.
- The bottom shelf is mounted on top and fixed by wood screws.
- On top of the table chassis two shelf plates are mounted. I cut away some of the material to make the shelves fit into the chassis. To make the table top more stable the two shelves are fixed together by screws
- On top of the inner shelf the spacer parts are mounted by using M6 screws and nuts. For each side four spacer parts are joined together by M6 screws vertical and wood screws horizontal.
- The top shelf is mounted with four M6 screws on each side.
The assembled workbench is 185 cm wide, 76 cm depth and 166 cm high. The table top measures 90 cm from the ground witch is about the right height for me when I stand up.
LIGHTING
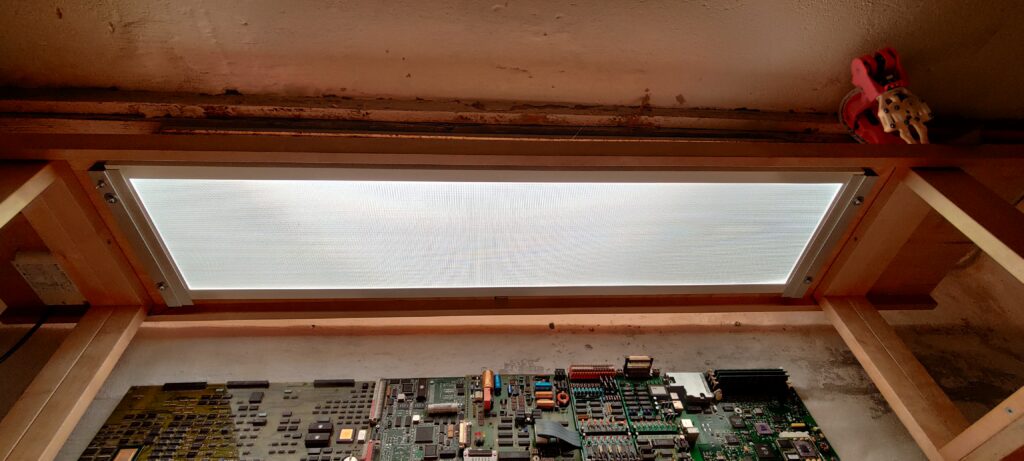
With the new workbench finished I realized that the top shelf is just below the old fluorescent lamps in the workshop. So I needed to find another source of lighting for the workbench. I knew I wanted the lighting to be LED based and started to look at LED strips on eBay. However one of my requirements was that the light needed to be diffuse and even so I can use the workbench as a simple “light box” for taking pictures of computers and projects without too much glare or shadows. Instead of mounting multiple LED strips and a diffuser on top I started looking for a solution that already included some kind of diffusing material. I realized that LED lamp panels aren’t that expensive, but most of them measure 60×60 cm. After a little search around I also found panels in a 120×30 cm size. This would make a perfect fit beneath the top shelf where the available space measures 134×34 cm. I found an almost new LED panel with a matching driver at DBA. When I received it I was surprised to find out that the driver also included a dimming feature. A push switch has to be connected as an on/off switch as well as a dimming function when the switch is pressed a little longer. I wasn’t sure if I could drill through the outer aluminum frame of the LED panel so instead I found some extruded aluminum profile I had lying around. The profiles are mounted directly into the top shelf and works great as mounting for the LED panel. The push switch is also mounted directly into the aluminum mounting with the cables hidden inside of it. The LED driver is mounted beneath the shelf and powered directly from 230V mains supply.
The finished light solution works very well. It gives a bright and even light on the table top. The dimming feature is nice but I’m not sure how much it is gonna be used. I will still keep my old architect lamp that I had on the old workbench. It will be mounted on the side to give some extra lighting from the sides. Maybe I will add an extra for the other side.
EXTRA FEATURES
After the workbench has been assembled there are still a few things that have been done and still need to be done. I will continuously add images of the different details when they have been installed.
TABLE TOP PROTECTION
I had a small piece of thin aluminum sheet that has been applied to protect the table when soldering or using chemicals or similar. It has been bent to fit over the front edge so it slides smoothly from site to site and can easily be removed when not in use.
CABLE HOLDER
I want to take advantage of the free space around the rectangular spacers for the top shelf. By mounting a threaded rod through one of the spacers and fixing it by a nut in each end, it can be used as a cable reel rack for small 0.25mm2 mounting wires in different colors.
On the end of the top shelf I want to mount a cable holder for mains power cables, USB, ethernet, HDMI etc. Hopefully it will help me from having a bag of tangled cable
FANS
Below the cable reel rack I want to mount some 120 mm fans both for cooling during the summer but mostly for removing solder fume from my face when working with precision soldering.
PCB BACKGROUND
Instead of the usual tool board on the wall behind the workbench I want to mount my PCB background plate that was actually made for building an extra circuit board coffee table. The PCB plate is a great background when taking pictures of projects or computers for the collection.
Now I just have to figure out where I want to store all my hand tools.
POWER STRIP
Another very important item that is still missing on my workbench is a power strip with plenty of outlets or maybe one on each side. One can never have too many mains outlets for e.g. light, soldering iron, oscilloscope, power supply, computer.
TOP SHELF
My idea with the top shelf is to use it for my oscilloscope and laboratory power supplies, together with decorative vintage electronics items, like an old PLC system like an Allen Bradley SLC 500 that I once got a lot of.
GALLERY
CONCLUSION
I’m very happy that I ended up grapping the parts that was about to end as bulk waste. Nothing was wrong with the wood, but someone just didn’t wanted it any longer. I ended up getting a great workbench for a very low price, the total build was finished within a couple of days and I managed to upcycle some old parts so they didn’t had to be thrown away.
The workbench is very sturdy and includes many of the features that I imagined including lot of storage room. The top part can be removed by unscrewing eight screws if I need a larger working surface for a project. The LED lighting is a nice solution, very discrete, but with plenty of light that can be supplemented by the architect lamp. I’m looking forward to use the table as a light box for taking pictures of my computers.










Excellent blog you have got here.. It’s hard to find quality writing like yours nowadays.
I honestly appreciate people like you! Take care!!
Feel free to surf to my blog; 토토사이트